Welcome to My Blog Post!!
An Easy More-Less
Spinner Game
All teachers love and need to have a variety of spinner games that can be used for different skills and levels. This post shows an easy way to make your own spinner and possible ways to use the included 4-part spinner that says: 2 more, 3 more, 2 less, and 3 less.
 How to make and use a spinner:
1. Decide what words or numbers to put on the spinner as well as how many divided parts. Once you have made and printed the spinner, the students are ready to go!
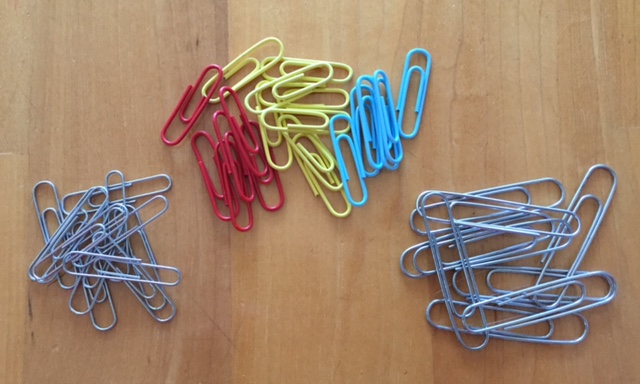
2. Use a paper clip and pencil to make a spinner out of the more-less circle. A large 2-inch paper clip is preferable because it spins more easily, but a regular 1-inch clip can also be used. To spin the paper clip, place the point of the pencil on the center of a circle. Hold the top of the pencil then flick the clip with your finger near the midpoint and it will spin. If some of your students have trouble doing this independently, they can have a partner hold the pencil and they flick the clip.
3. Have the students practice this a few times.
The spinner can be used with both lower and higher numbers. I have used this spinner with numbers 0-20 and as well as four-digit numbers. I like to have several of these spinners on hand so it can be used throughout several grade levels.
 |
| Number Line 0-10 |
 |
| Hundreds Chart |
*Place the marker on any number from 0-20 on your number line. Initially, the teacher may wish to select the starting number. Possible ideas might be - teacher saying the number, drawing the starter number card from a bag, partner giving starting number, or other of your clever ideas.
*Spin the spinner to see if it lands on 2 less, 2 more, 3 less or 3 more. Touch and put a marker on the starter number.
*Start at the number where you placed your marker. Move your marker to a number higher or lower, depending on where your spinner landed.
*Continue playing the game until it is time to stop.
*You may use a journal to record the ending number.
**Challenge for younger students -Verbalize the number sentence that you did, such as: 7 is 2 more than 5; 13 is 3 less than 10, etc. Encourage math vocabulary when asking students to verbalize.
**Challenge for younger students -Journal work might include simply making the equation that you made with the spinner such as: 5 + 2 = 7; 13 – 3 = 10
 |
| Spinner |
For students working on higher numbers
*The rules could be the same as above, but use higher starter numbers. Also if you need a visual aid tool, use some of the higher number charts you can find online sites. Examples could be charts showing numbers 200-500 and higher.
Record Observations
 *These students need to reinforce their learning with journal work using equations, making up their own word problems from spinner results, or another goal, which you might want to work on. An alternative recording method could also be dry erase boards.
Gathering Materials
Some of the materials you will need to gather are: the spinner, paperclips, pencils, journals or something to record responses, small markers (i.e. dried beans), the more and less (2 more, 3 more, 2 less, 2 more) cards as alternative choice for spinner, number line and/or hundreds charts, number cards, if you wish students to randomly select the target number.
 |
| Two spinners on a page |
If you are having students work in small groups or partners, gather and place all the materials in a container prior to starting the project.
If you wish a smaller spinner and use less paper, use this smaller spinner with two on the same sheet.
 |
| Word Cards |
Another way you can incorporate the same skill idea is to change from using the spinner to using word cards with same words. Often your students will get tired of just using the spinner so changing it to word cards will get a bit more useful with the same skill idea.
Thank you so much for visiting my blog. I hope you can use some of the materials and ideas you have seen.
If you go to my teacherspayteachers store-MakeMathMagic
https://www.teacherspayteachers.com/Store/Make-Math-Magic you will find this product.