Welcome to
my blog post!
Comparing
Two-Digit Numbers
Snowmen
Task Cards
This post has
a variety of winter activity options to be used as small teacher-led groups,
partner work, independent activity, or in your math center. At the end of the
unit, use the true or false worksheet as an assessment tool. Check out the full product in my TPT store, Math Math Magic.
It is
the perfect time
of the year to use this fun snowman activity, which reinforces your student’s
practice of determining which sign, <
> or = should go in the expression to make it
correct. My students always get a laugh out of the snowmen graphics. I had
students make new sets of the snowmen-some with shovels in their arms, and another
was holding an elf!
What
extension ideas can your students create?
Before using the
snowmen task cards, be sure your students understand the difference between the
equality signs < > =. I wrote in an earlier blog post some tips that might be helpful to students about the signs. The blog post was titled, 'More-Less Spinner Game.'
I have
included a hundred’s
chart as some of your students may benefit from using the chart as a visual
tool.
 |
| Snowman Hundred's Chart |
Print
the task cards on
stock or heavy construction paper for durability and longer use. Laminate all
the cards (4 per page) and cut these cards along the dotted lines. Also do the
same also for the mini equality cards ( < > =). There are three varieties
of these cards, as discussed in the optional ideas.
 |
| Black & White Task Cards |
-->
To help with your printing
needs, the pages come in black & white as well as
the color printed pages. You may want a copy of the color printed pages for
your file and print the black and white for most student’s daily use.
 |
| Task Cards in Color |
Optional
Idea 1
1.
Write the correct equality sign on the laminated cards.
2.
Students record their answers on the recording sheet
3.
Responses can be checked in 2 ways – by using the answer cards and or the
recording answer key sheet.
-->
4. You
may wish peers to check each other’s work or select another method of monitoring
their responses.
Optional
Idea 2
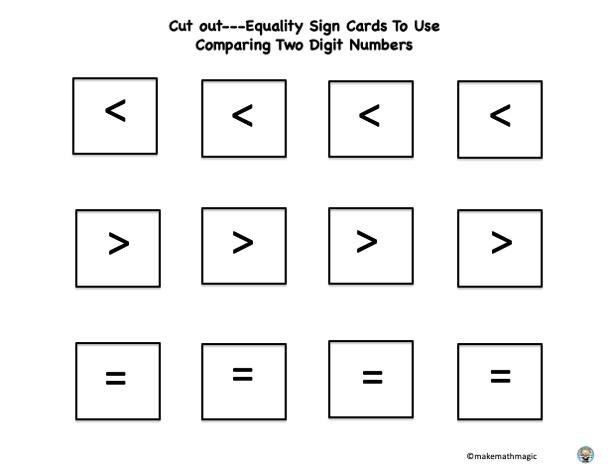
 |
| Equality Sign Cards |
1. Use
the mini equality cards (< > =) instead of writing the signs on the card.
Students place a correct sign on each card.
-->
2. There is a set of the mini equality cards
that have the words below the equality sign as a reinforcement tool if needed. There
have been occasions where I wanted a child to start seeing the words to
facilitate a visual recall better. You may have students who may also benefit
from this tool.
3.
Students record their answers on the recording sheet.
4.
Peers can check each other’s answers either by using the answer key cards or
the recording answer sheet.
Optional
Idea 3
1. Having
students make their own set of cards is another way my
 |
| Make Your Own Numbers and Equality Signs |
students love to use these cards. Students
use the blank set of cards and put in their own numbers and equality signs to
match.
2. Ask a peer to check the
work.
Optional Idea 4
1.
The true or false cards
or the single worksheet can be used as both a follow-up sheet and as an
assessment tool.
This posting
shows only some
of the full product. If you order the
activity, this is what you will be getting:
•Total
of 28 color and black & white task cards in which students compare
two-digit numbers. Students show the comparison by writing or placing the
equality sign (< >
or =) on the task card. Cards
represented are:
•Four cards
with the = sign, 12 cards with the < sign, 12 cards with the > sign
•Answer
key cards in both color and black and white.
•
< > = equality
mini-cards to place on the cards - an option other than writing the sign on the
card (color and black & white)
• An additional mini-card sheet that has the words---more, less and equal under the equality
sign
•Make
your own comparison number cards (color and bl/w)
•A recording
sheet and answer key
•A true
or false assessment worksheet sheet with the answer key
•A hundred
chart
•Directions
and suggestions
I hope you and your students have great fun using this activity. Please follow me for more ideas and activities. You can also see more of my work on Facebook and Instagram.